Tuesday, November 30, 2010

Four wheels

Masekarti

One of my long term dreams is to build my own sportscar. The three things that are most needed in a project such as this -- that I don't have currently -- are space, time and money.
So to give me the feel of this type of build without the above requirements, I figured I would scale down the build somewhat. So I'm going to build a approx 1/3 scale minikart. I was thinking intially a pedalcar, but because the body is going to be fairly narrow, an electric minikart is a better option.

The intent is construct the Masekarti similar to a real car build. So it will have a sheetmetal or aluminum body and a simple ladder frame chassis. I will be using 10" diameter spoke wheels on it and it will be powered by an electric sccoter motor (250W-350W) with a couple of 12V battery packs and a speed controller.

I figure the Masekarti should be good for 20-25km/h with 3-5 year old child piloting it.

So what I am going to build? Well, I have an appreciation for vintage/classic sportscars and racing cars from the 1940s/1950s/1960s time periods. So I have decided on building something similar in spirit to the 1949-50 Masertai 4CLT.


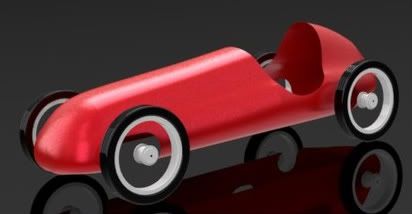
With the make/model of car selected, the next task is to make a 3D CAD model of it. The purpose of the model is to build a buck that I will use to help metalshape the  Masekarti body.

I went online to a couple of sites that have freely available blueprints and found the one I needed. So after putting in a number of hours, I came up with this basic model. I still have to design the chassis and other mechanical pieces (steering, front/rear axle mounts etc), but this model will allow me to create the buck and start metalshaping.
Tuesday, November 9, 2010

Rust Never Sleeps

XS650 Cafe

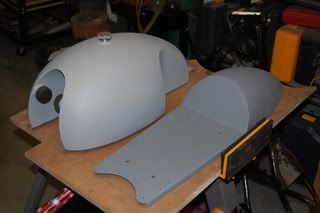
I have had my gas tank, seat cowl, fender and battery tray in bare metal for some time now, and they were starting to gather surface rust. So I did some preliminary prep work and blasted them with primer.
This is an intermediate step until I get them painted early next year. 


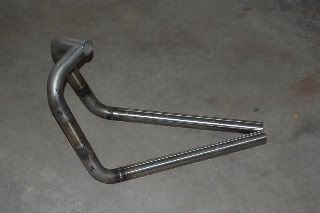
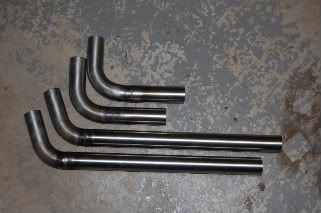
I got a start on welding the exhaust headpipes. I still need to weld on the flanges that attach the headpipe to the engines, and build the mufflers. But that will be done early spring next year.


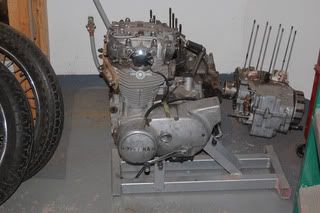
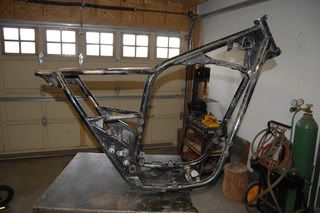
I removed the engine from the frame and will be ready early spring next year to paint the frame and clean the engine up.

Wednesday, August 4, 2010

Just Exhausted

XS650 Cafe
I have started to put together the exhaust system. I am using 16g stain steel tube comprising of 90 degree bends and straight tube. The next step after the headpipes have been fabricated is to build the mufflers. I will be fabricating reverse cone muffler from 20g stainless steel.


Other Motorcycles
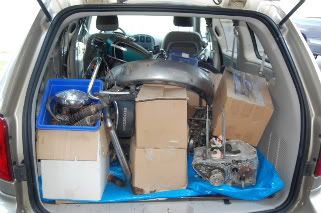
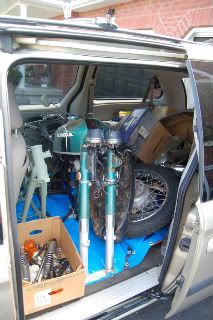
I was able to pick up for a reasonable price, two more motorcycles that had both been disassenmbled. The motorcycles are a 1972 XS650 and a 1971 CB350. So my plan is to build another Cafe Racer from the XS650, using an aluminum tank, seat and fender set that I have been working on. For the CB350, my initial plan is to build a streettracker with a vintage feel/look to it. 


Saturday, July 17, 2010

Still at it

XS650 Cafe

I am trying to finish up leak test/repair on the tank this week, and then I can seal it.

For leak testing I hooked up a bicycle pump to one of the petcocks, and used a spray bottle with soapy water to check the joints. I found a a number of pinhole leaks that I sealed up using lead solder. I decided to use solder instead of welding to minimize the amount of heat being applied to the metal. Welding the pinholes would require to much heat leading to more warpage.

I will be coating the tank with POR-15 sealer, so if I miss a pinhole or two, it will be sealed. I would just prefer to eliminate as many leaks by soldering them first.

I also cut out the padding that will be going on the seat cowl. I stil deciding if I should increas the thickness in some areas.

Starting to mockup the exhaust header pipes. I need to get some stainless filler rod, then I can proceed to welding the tubing.

Photobucket

Back at it

CNC Mill

It was fun while it lasted, but I decidede to sell it to free up the (little) time I have to focus on my metalshaping/motorcycle projects.

XS650 Cafe Racer 

So I am back at the motorcycle project. I have to work furiously now to get what I can done during the summer.

The gas tank now has the fillercap, petcocks and front and rear mounts installed. I designed the front mounts such that they use the stock frame ears. It works well.

Gas Tank

I reworked the seat cowl to butt up to the tank. When I get around to upholstering the seat cowl, I can make it flow from the gas tank. 

Seat Cowl

The front fender is completed, I am now working on the mounting for it. I will be creating a fender mount that is also a fork brace.

Front Fender

Here is a pic of the gas tank and seat cowl set on the frame.

Tank and seat on frame

The exhaust system is being worked on also. I am creating it out of 1 5/8" stainless steel  tubing. It will be 2-into-2 system with short (15m") megaphone mufflers.

Exhaust Tubing Exhaust Port

 Miscellaneous Metalshaping

In my last entry I mentioned starting to work on creating a gas tank and seat cowl out of aluminum. Here is the original tank that I am using as a reference.

Reference Tank

I have started to shape the tank pieces. Here are a couple of pictures showing the progression from flat sheet to some rough shape.

Flat sheet Roughly shaped 

Here are a couple of pictures showing the seat cowl buck and the initial shaping so far.

Seat Cowl Buck Buck and Rough Metal

I am also creating in aluminum another gas tank identical to the steel one that was made for the Cafe Racer. Here is the progress on that so far.

Gas Tank

To weld these tanks and seat cowls I will be using gas welding, same as I use for welding steel sheetmetal. Gas welding sheet aluminum has it's own challenges, and is more difficult than steel sheetmetal. Why use gas welding for aluminum? Well, aside from it being the only welding equipment I have available, gas welding aluminum allows for a stronger weld. Gas welding can achieve full penetration of the weld joint more effectively than TIG welding.

Here is my first crack at gas welding aluminum. The first picture is the weld bead, the second picture is the weld bead filed down. Both pieces were butt welded.

Gas Weld Gas Weld Filed

CNC Mill(er) Time

CNC

I am gearing up to use the mill to cut out some prototype parts.

 What I wanted to do before this is to build an enclosure for it.  I haven't done that yet, but I am probably half-way there. A friend of mine who runs a metal fabrication business bent me up two 26" x 40" 16 gauge sheetmetal trays with 3" walls. The plan is to use them for the top and bottom of the enclosure and use .5" thick fibreglass coated plywood for the sides. 

What I have installed is just the bottom tray, over the spring/summer I will finish the enclosure.

CNC Mill with tray

XS650 Cafe Racer

It has been a slow slog to finish off the metalwork on this motocycle, but I am slowly making headway. I have fully welded up both the gas tank and the seat cowl. Next step is to install some petcock bungs (2) on the tank and do a pressure test for pinhole leaks. After that install a filler cap, the front and rear mounts and call it a day for the tank.

Tank bottom Tank and Seat

Miscellaneous Metalshaping

I have been really eager to get into doing some projects with aluminum,  so I purchased a 4' x 6' of 3003 (.063"). My plan is to create a another gas tank and seat set like the one I am currently working on, but this time in aluminum and polish it.

As well, I have another gas tank that a friend of mine gave me that I like the shape of...it is more box-like. So I will be making two aluminum tanks of that tank design, but stretched 1.5" longer. I am in the midst of designing a seat cowl to match the flow of this tank.

Tank Top

XS650 Cafe Racer

The top of the tank has both knee cutouts welded in. The next steps are to, grind down the welds, stretch the heat affect zone (HAZ) areas and metalfinish the tank.

Tank Side  Tank Back

I managed to roll the tank tunnel as well. The results are pretty good.
I was stumped for a while trying to figure out how to roll the correct radius. A few emtpy apple juice cans provided the solution. I welded them together and rolled a piece of 16 gauge sheetmetal around it.  
From the pictures you can see that the tunnel fits within the tank buck fairly well. The next steps are, weld the end cap on the one side (shorter side) and start the tank-to-tunnel fitment.

Tank Tunnel Side Tank Tunnel in Buck Tank Tunnel in Buck